Easy Environments
The Easy Environments series for Daz Studio and Poser combines high-res Skyboxes (6x 4096×4096) or Skyspheres (12.000×6000) with terrains fit for close range shots.
Below you`ll find some tip and tricks for working with those sets.
Update Feb 3rd 2018:
This is a long running series of environment sets, naturally it changed and adapted along the way.
The biggest change was switching from Skyboxes to Skyspheres/HDRIs. I tagged all set-infos below accordingly to make it easier for new users to tell them apart. On the Daz Studio side of things this also tells you if a set has Iray support out of the box, – if it`s a SkySphere/HDRI set it comes with an Iray version.
The Daz Studio versions also switched the file format from .pp2 to .duf (native Daz) at the same time. Meaning sets up to “Autumn” are found in Daz Studio`s “Poser Formats” content library, sets from “Hell” on are in the “Daz Studio Formats” section.
Snowy Mountains is a mix, only the Iray version is in .duf format (Iray released at that time, I updated the set for it at a later point, thus the odd mix).
Table of content
1) Skybox Introduction (older sets)
2) Working with Skyboxes (older sets)
3) Skyspheres
4) HDRI & Iray
5) Easy Environments -Lighting
6) Easy Environments -Cameras
7) Easy Environments: Winter (Skybox)
8) Easy Environments: Mountain Trail (Skybox)
9) Easy Environments: Greenlands (Skybox)
10) Easy Environments: Eternal Sands (Skybox)
11) Easy Environments: Road to Hell (Skybox)
12) Easy Environments: Top of the World (Skybox)
13) Easy Environments: The Rock (Skybox)
14) Easy Environments: Outback (Skybox)
15) Easy Environments: Oasis (Skybox)
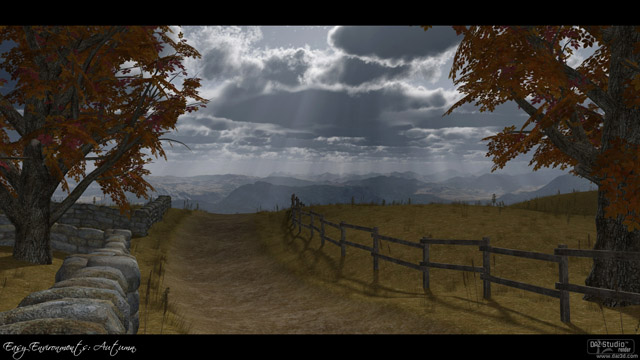
16) Easy Environments: Autumn (Skybox)
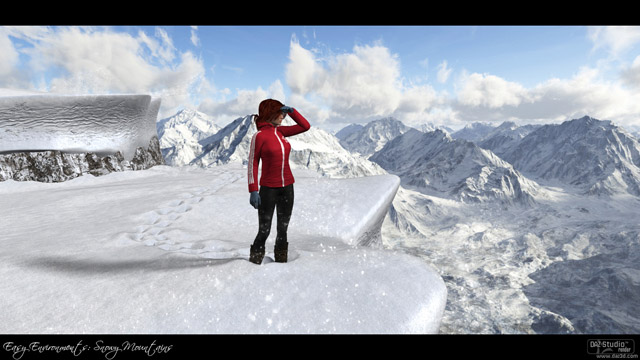
17) Easy Environments: Snowy Mountains (SkySphere/HDRI)
18) Easy Environments: Hell (SkySphere/HDRI)
19) Easy Environments: Tree of Life / First Light (SkySphere/HDRI)
20) Green Hills, High Peaks, Eternal White (SkySphere/HDRI)
21) Easy Environments: Witchcraft: Sacrifice & Eclipse (SkySphere/HDRI)
22) Easy Environments: ExoPlanet I-III (SkySphere/HDRI)
23) Easy Environments: ExoPlanet IV / Sunset / FM Chasm (SkySphere/HDRI)
24) Easy Environments: Clouds (SkySphere/HDRI)
25) Easy Environments: Autumn Hills (SkySphere/HDRI)
26) Easy Environments: Winter II (SkySphere/HDRI)
27) Winter II: Night & Dawn (SkySphere/HDRI)
28) Easy Environments: ExoPlanet V (SkySphere/HDRI)
29) Easy Environments: Sandstorm (SkySphere/HDRI)
30) Easy Environments: Frozen Lake (SkySphere/HDRI)
31) Frozen Lake Skyspheres/HDRI (SkySphere/HDRI)
32) Easy Environments: Raft & Lagoon (SkySphere/HDRI)
Update 06/2021:
The Tips & Infos for the sets 26 to 32 have been moved to their respective Gallery Pages, due to the website acting up.
The links above should get you there.
Future Tips & Infos (should I have any) will be posted directly to their respective Galleries on the Mainpage.
1)
Skybox Introduction (older sets)
For those who have never heard of skyboxes before, it`s a similar thing like a skydome (more common with DS/Poser), but has the shape of a cube and seamlessly covers your whole scene.
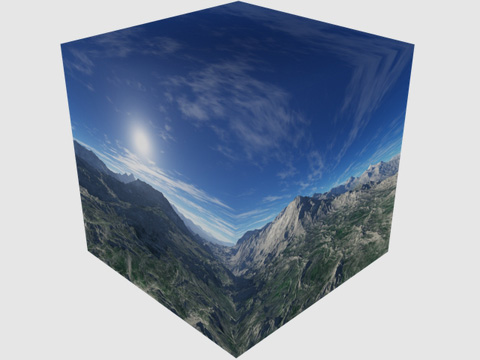
Skybox from outside
Since all skyboxes on the Easy Environments series can be loaded alone (without the terrain) it`s very easy to use them for other scenes as well. It`s a great solution for more open settings, which require the lower parts of the scene to be covered.
Greenlands Skybox with a part from “FM Planetarium”
2)
Working with Skyboxes (older sets)
Working with skyboxes is as easy as it comes, load it, render it. 😉
However, you have some options to change the appearance.
You can move, scale or rotate the box, all of it will change the parts your camera frames, and thus change the general look a bit.
The color and brightness of the skybox is defined by it`s ambient color. In most cases the default ambient color will be a pure white.
Reduce the ambient color along the greyscale to darken the skybox, or even use colors to give it a tint. Results will vary, but I find it worth experimenting.
Winter default
Winter with a soft red color tone (skybox ambience & lighting)
Size matters!
At least relative size.
Be it a skybox or a skydome, the closer you get to the rim the more distortion you will see.
Now imagine the skybox as a cube of 10x10x10 and move the camera by 9. You are now close to the rim and it will look ugly.
Make the skybox 100x100x100 and move the cam by 9 …you are still far off the rim and everything is fine.
I chose the skybox size for the easy environment sets in a way that allows you quite some camera movement, but also within the limits of Poser`s preset overview render distance, which is quite short. I think you`ll rarely run into distortion, but if you build a really huge scene you might want to consider scaling the skyboxes up.
On a sidenote, I also added a morph to the skyboxes, which allows you to turn them into a more spherical shape, or the opposite (whatever that is called). It`s more a fun thing, but you can give it a try, and sometimes it may even be useful.
3)
Skyspheres
Snowy Mountains is the first set of the Easy Environments series to feature a skysphere instead of the skyboxes used by previous sets.
This is not to be mistaken for a dome, the sphere covers the whole scene top to bottom, just like the skyboxes you are probably used to.
In general it`s mostly a change for technical reasons, in terms of quality and comfort of use you shouldn`t notice any difference.
The scale of the sphere has less impact on the appearance than it is the case with boxes.
In order to stay within the limits of Poser`s camera range preset I scaled it slightly smaller than the later skyboxes.
If you need more room for objects you can easily scale it up. Actually the preload has it at only 5% of it`s original scale.
One small advantage compared to the skyboxes is that even on relatively small scales the sphere is less likely to show perspective distortion.
Personally I also find it easier to handle a single texture for adjustments like contrast, brightness, etc..
As for painting additional elements onto the texture in 2D applications, around the horizon it is easy, but in order to paint the top/bottom regions it would be better to use a 3D application.
Another benefit of the change to spheres is the compatibility to the Iray render “dome” new to Daz Studio 4.8, and the HDR capability that comes with it.
4)
HDRI & Iray
All Easy Environments from “Snowy Mountains” on include Iray versions. A HDR (high dynamic range) image is used on Iray`s internal SkySphere. This image also lights the whole scene. Any changes you may want to make (e.g. rotate the sky) are done through the Render Settings tab.
You can do a couple of visual adjustments.
-Under Render Settings/Environment you can rotate the (Iray-)skysphere and change the intensity.
-Under Render Settings/Tone Mapping you find options such as Saturation, Burn Highlights, Crush Blacks.
Those affect the whole scene/render, but I find them useful to adjust the look of the HDRI.
If you render Iray scenes with a HDRI environment make sure you don`t have a skysphere or skybox from another set in your scene.
It would block out the HDRI and give you a black scene. I know this seems kinda obvious, but I had it come up a couple of times.
5)
Easy Environments -Lighting
The lighting provided with the sets is adjusted to fit the scenes, the particularly important part here being the direction of the sun. If you rotate the skybox you should rotate the lighting accordingly.
Daz Studio Tip: Simply drag&drop the lighting onto the skybox (to make the lights childs and the skybox the parent) before rotating the skybox. Now the light will follow any rotations.
The more recent Easy Environments come with lighting parented to the skysphere by default, unfortunately not an option with Poser.
Note, older sets: The lighting provided with the sets is made for the full scene&skybox preload, on which the skybox may be rotated by default. The skybox-only preload is not rotated, the sun will always be in the “north” . Thus you may have to make adjustments to get the skybox-only preloads and the lighting together.
6)
Easy Environments -Cameras
There are no cameras included with the sets, but I`d like to add a tip or two.
First, I found wide angles (focal length) to work great with those sets. Most of the promo renders use it. It just goes well with landscapes.
DS: select camera, Parameters Tab, Camera, Focal Length. Preset is 65, I liked values of 50 to 55.
Poser: Check “show cameras” in the Hierarchy Tab, select the camera you are using, change “Focal” in the Parameters Tab. The Default values vary depending on the camera, I liked to reduce it by up to 10mm.
Depth of field also goes very well with landscapes, I might do a seperate tutorial on that later if there is interest in it.
Link: Depth of Field Tutorial
7)
Easy Environments: Winter (SkyBox)
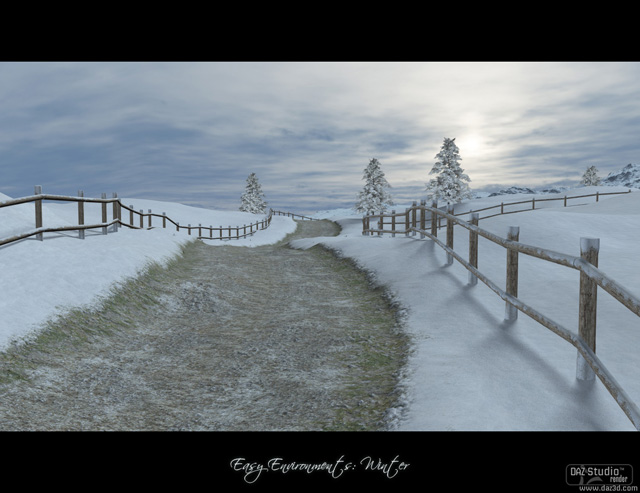
Not that much to tell here…
The trees have “cast shadows” off by default, to keep high render speeds. Depending on your camera angle you might want to turn shadows on for some of the trees. On DS this setting is a bit hidden, you find it under Parameters/Display/Rendering (with the tree selected).
On the alternative “natural trail” preload of Winter the trail is made from two materials (nattrail01 & 02). One of them leads south-to-center, the other one center-to-north.
If you want to remove one or both of them just remove the displacement map, and change the diffuse texture to the one used for pure snow (fmwi_snow01).
The set uses displacement maps, so Poser (7) users don`t forget to turn it on in your render settings 😉
8)
Easy Environments: Mountain Trail (SkyBox)
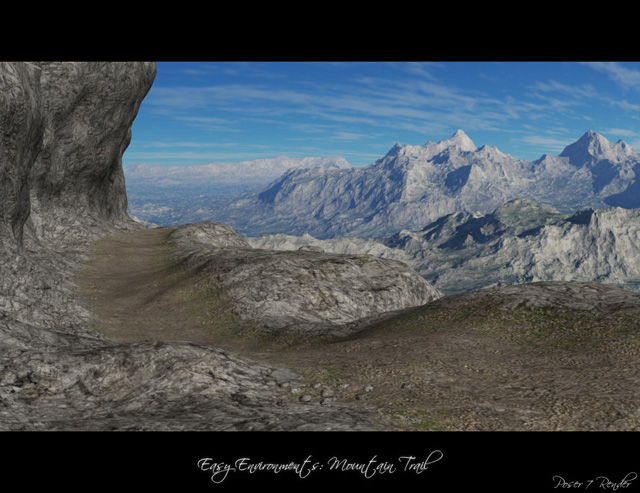
I really got nothing substantial to add here, but it seemed weird to leave it out. 😉
Well, I find the small stones on the trail look a bit too dark on the shadow-side, so for the perfect render you might want to adjust the ambience. Or hide them.
That aside everything should be pretty easy to handle.
Oh, and I could add the usual “Poser (7) users turn displacement maps on” info.
9)
Easy Environments: Greenlands (SkyBox)
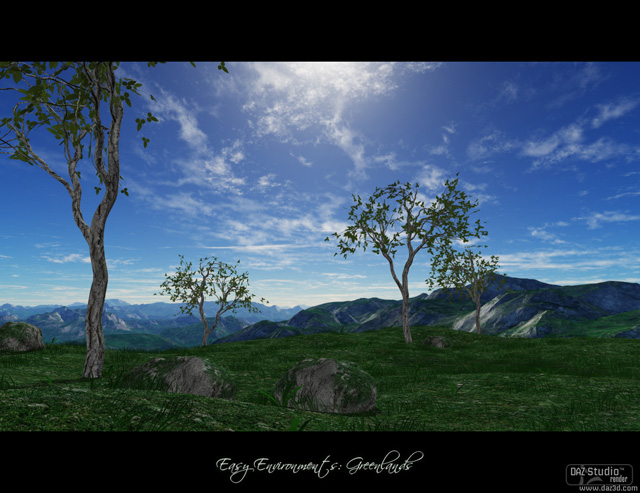
Just a small tip in case you want to place architecture on the ground.
If the floor is too bumpy keep in mind you can scale it along the Y-axis to flatten it.
The skybox On Greenlands is scaled rather small, so if you use it for other scenes you might want to scale it up a bit
(eg. for a larger scene like Mountain Trail I used 250%).
10)
Easy Environments: Eternal Sands (SkyBox)
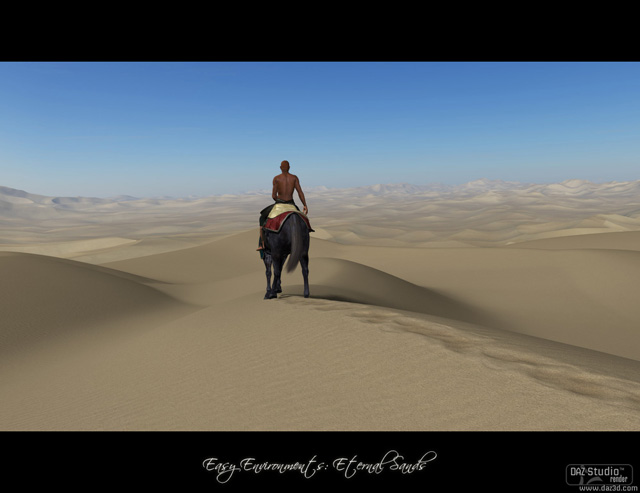
Poser: I turned “Visible in Raytracing” off for the natural trail version of the terrain.
This fixed some rendering errors which occured around the displacement map.
Internally (pp2) that value is named “Visible in Reflections”, so once can throw a coin to decide what it really does.
Anyway, I didn`t notice any difference except the render errors being gone. (Edit: I now know it affects self-shadowing, but that doesn`t come into play much on this set)
11)
Easy Environments: Road to Hell (SkyBox)
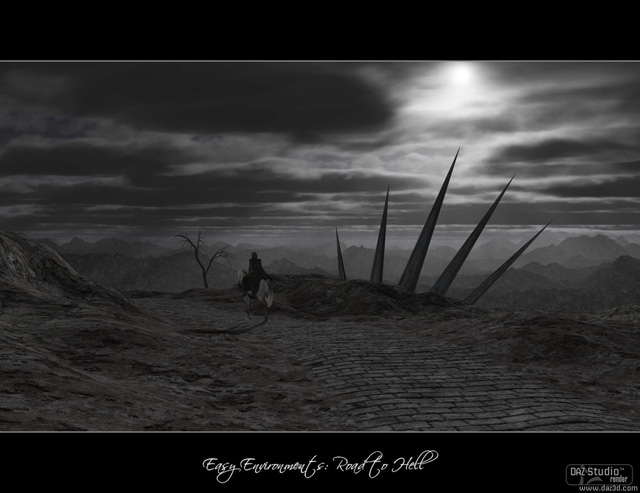
This is a really dark set. In case you want to brighten it up just use higher values for the lights, particularly the 3 ambient (directional) lights.
Bonus skybox: Keep in mind all “skybox only” preloads load with the sun in the north. So if you want to use it with the included lighting you might want to rotate it accordingly.
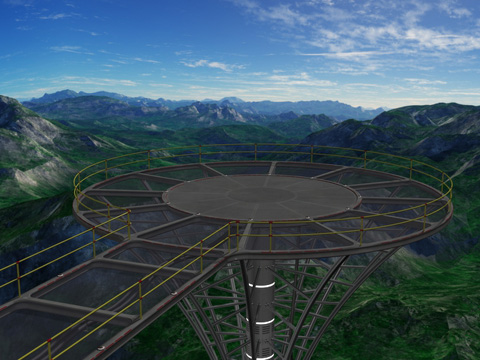
12)
Easy Environments: Top of the World (SkyBox)
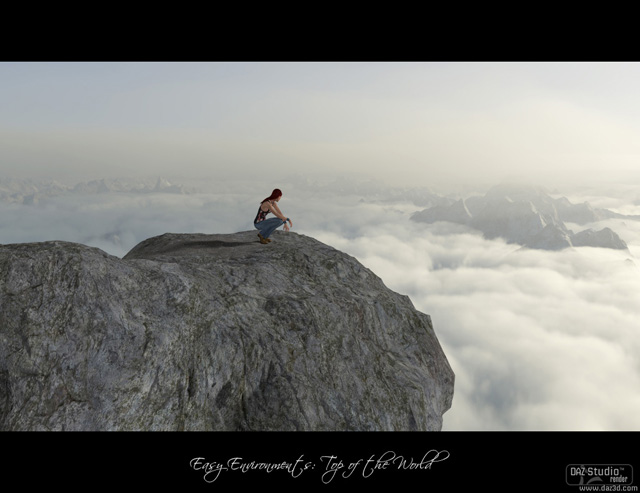
Highly recommended: wide camera angles!
I found Poser`s main cam way too narrow for this set, the Dolly cam worked better.
For the promo renders I used values down to 22mm (Poser, Focal) and 45 (DS, Focal Length).
The displacement value on the rock is something you can toy with, I used what I liked best, but higher values can look nice as well.
13)
Easy Environments: The Rock (SkyBox)
The main topic for this set is clearly the water, so I will start there.
The tricky part about it is blending it into the skybox. Here is an illustration to show where the water meets the skybox.

I`ve set up the material defaults to work best with rather flat camera angles, because they are most common for character centric-renders.
On steeper camera angles the “blending” will be a lot less convincing with the default settings. Specularity and reflections brighten up the water-geometry, while the water on the skybox remains static (or to be precise, it`s darker towards the center).
Cut short, you will want to adjust the water material.

To get the water darker I found it best to change a couple of values together:
-Darken the diffuse color
-Turn up Glossiness to narrow specularity (=lower highlight_size on Poser) and/or reduce specular intensity.
-Turn down reflections.
Additionally, making the water more transparent can help blending into the skybox.
The opposite approach (more specularity, more reflection) can be used to brighten up the water, eg. usefull for shots towards the sun, where the water in the skybox is touched by sunlight.
Tip: Use “spot rendering” to quickly check your changes.
Note: The lighting also affects the look of the water. If you don`t want to use the included preset lighting you`ll likely have to adjust the water as well.
Skybox size & cameras:
The skybox on this set is bigger than the previous ones, there`s good reason for it, but I doubt anyone cares. 😉
Poser has a very limited default render distance for it`s preview-window, shorter than the skybox scale.
The “yon” value defines the preview distance on cameras. I have added appropriate values to scene and skybox preloads for main, dolly and aux camera, so you don`t have to care about it there. If you switch to a different cam you won`t see the skybox in the preview unless you up the yon value for your camera.
Daz Studio users unfortunately will see the Poser cameras where I changed that value, but they do no harm. Ignore them, delete them, use them…it doesn`t matter.
Tip: Reflections with Daz Studio:
If you want to get stronger reflections on the water you will probably wonder how to do that since it is already set to 100%.
On DS you have that little cog-wheel next to many parameters. If you click it you can turn “limits off”, which will allow you to set values higher than 100%.
What is that water-plane prop good for?:
Let`s say you want to render a scene with a ship in the “skybox-ocean”. If you just put the ship in, it will look as if it was flying over the water.
You can use the water-plane as the “base” to place your ship on, pretty much like it`s done for the rock on the main set.
Render settings with Poser (recent versions):
My version of Poser 10 has massive “gamma correction” on by default, which is weird. Make sure it is turned off, it does wild stuff with reflections.
Render settings general:
Just a small tip most of you will know anyway. Set raytracing to at least 3, better 4.
It`s needed to properly render trasparent&reflective surfaces.
Render times:
Surprisingly quick for a scene with water, at least for me, maybe because the reflections mostly catch the skybox.
The promo renders I did took about 2 to 4 minutes.
Waves:
The waves are driven by the displacement map. If you want less of them just reduce the displacement.
On close-ups it can look a bit off (artefacts), which would be an instance where you want to turn it down a bit.
14)
Easy Environments: Outback (SkyBox)
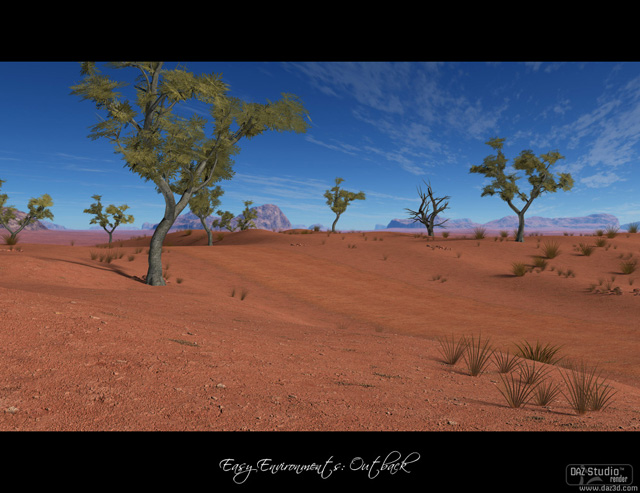
Pretty easy set.
The tree`s leaves are preset to not cast shadows, that`s how the promo images were done as well. It helps to speed up rendering, and I didn`t feel it would be a big loss. Of course you can turn shadows on anytime, might make sense if you render a tree close-up.
As usual with the easy environments, wide camera angles work very nice.
I find the cobble stones a bit hit-or-miss, depending on the angle/lighting. They are a seperate prop, so in case you think they stand out too much just hide or delete them.
15)
Easy Environments: Oasis (SkyBox)
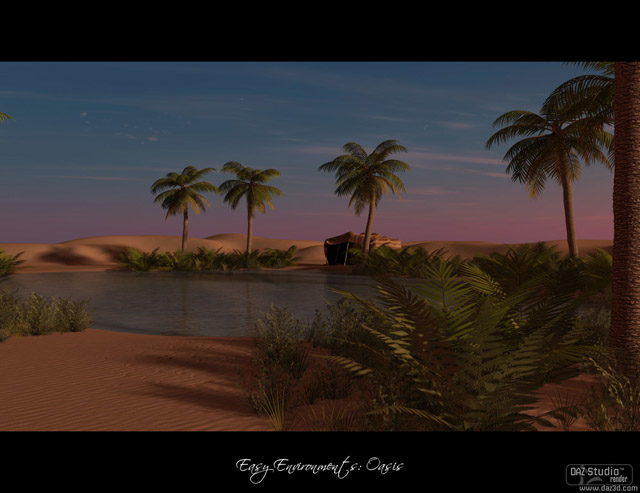
Eternal Sands
As you would expect, this set really works great with the skybox from “Eternal Sands” ( and vice versa).
Water / Reflections
If you want to increase the reflections on the water I recommend to lower the bumpmap-strength rather than upping the reflection strength.
The later is likely to mess up the brightness of the surface, while reducing the bumps just turns it into something more like a mirror.
Poser, Gamma Correction
Recent Poser versions have that gamma correction parameter in the render options, older versions don`t.
Thus the set is designed to be rendered with gamma correction off. Reflective surfaces react heavily to it, so if you have it on results will look wrong.
Rendertimes
Water and Vegetation are not easy on rendertimes, but Daz Studio deals surprisingly well with it. I got about 10 minutes there with lots of vegetation framed.
Poser however, not so good. For preview renders I strongly suggest to turn shadows off for all the vegetation, and maybe hide the water.
I added a Poser “Test render” preload which you could also use for drafting. It has shadows disabled and the reflections removed from the water.
For final renders I recommend to keep the shading rate at 0.3 or higher. It`s still not exactly fast that way, but my standard 0.2 setting was quite a nightmare.
That said, I am no Poser expert, so maybe there are some settings suited for that kind of scenes I don`t know about. If you have any good tips about that just bring them to the Link: Daz Forum
16)
Easy Environments: Autumn (SkyBox)
No special info on this one, it`s pretty straight forward 😉
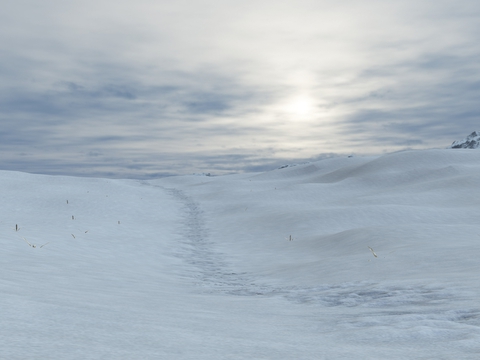
17)
Easy Environments: Snowy Mountains (SkySphere/HDRI)
Ops, I forgot to add something here upon release, or maybe there was nothing special to be mentioned. 😉
Well, Snowy Mountains is the first Easy Environment which uses a “SkySphere” instead of the previously used “SkyBoxes”. You can read up on that above.
Post release the set was updated with an Iray version. Which had a terribly huge HDRI sky. Since I finally found a way to compress those things I`ve submitted a much smaller texture to Daz, I hope they`ll push an update sometimes. (It makes no visual difference but should help in case your system struggled to handle the 200mb monster)
18)
Easy Environments: Hell (SkySphere/HDRI)
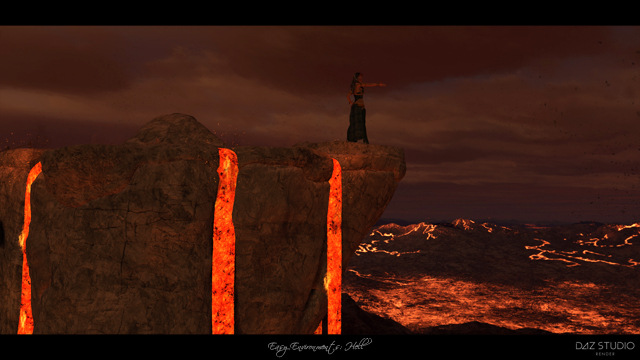
Now this is a happy mood set 🙂
This is the first Easy Environment to release in native .duf format for Daz Studio (except for the Snowy Mountains Iray update), so don`t get confused if you don`t find it next to the other sets in the content library.
Iray:
Working with the Iray version I recommend to use “texture shaded” with no preview lighing in your main viewport until you need to set up fine details. The Iray preview is quite slow (at least on my system) and takes a while to calculate opacity, which makes it hard to see anything.
Also note that you`ll likely want to load both, “Hell Iray” and “Hell Sky Iray”, the later adds the sky to your Render/Environment settings.
To be frank, in most cases I`d prefer the 3Delight version.
Poser:
Not much to say here, don`t let the lighting preview fool you, Poser(10) seems to have a limit for how many lights it takes into account, so it will look differently in the final render.
Ashes:
The set has two “Ash” objects. “AshesMain” holds ash close to the terrain, “AshesOS” is like a ring around the main area.
If you do renders with a camera pointing from the outside towards the center, that outer ring often adds a nice dirty effect, but could also get in your way. In that case you can simply rotate AshesOS along Y to bring it in a better suited position.
Of course you can also hide/delete both layers anytime if you don`t want the effect.
Shackles:
The shackles are separate objects, not merged to the chains, and have proper centers (pivots) for scaling.
That allows you to scale them to your needs, if you want to remove the shackled angel and place your own characters there.
SkySphere:
Unlike most other sets the lighting of the sky is rather diffuse, so imo it`s ok to rotate(Y) it without worry about the lighting. That way you can easily frame the parts of the sky you like best.
As always on those environments, wide camera angles usually give you more spectacular views because they capture more of the sky.
19)
Easy Environments: Tree of Life / First Light (SkySphere/HDRI)
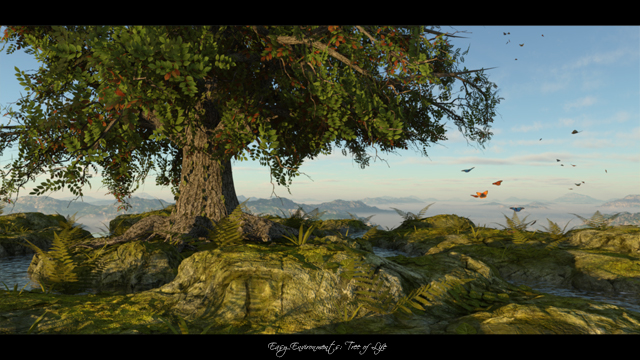
Tree of Life is the second Easy Environments set releasing in native .duf format for Daz Studio, so if you use the content library make sure to browse the native directory.
Compared to most other Easy Environment scenes it`s likely more taxing on your system due to the vegetation. It renders quite fast for me, but might take a while on weaker systems. If need be, you can hide some of the ground vegetation.
3Delight:
Making use of the native format the 3Delight preload is pretty much a ready-to-render scene.
The lighting is now parented to the skysphere, thus rotating the sky automatically rotates the lighting as well, keeping the sun in the right place.
The skysphere-only preload also has the lighting parented, so if you load the sky on any scene the lighting loads with it (I included a lighting-only preload as well, in case you want to use it seperately though).
If you are used to the older sets just keep in mind the lighting is included now, so you don`t end up loading it twice.
If you want to use the First Light sky, remove the original sky and lighting from your scene.
Iray:
Iray has one scene and one sky preload, since the sky lights the scene there is no additional lighting required.
I recommend to start working in shaded texture mode for better performance, and only switch to the Iray viewport once you have done your basic setup.
Poser:
Business as usual here. 😉
One scene, one sky, one lighting preload.
20)
Green Hills, High Peaks, Eternal White (SkySphere/HDRI)

Those are environment-spheres for 3Delight and Poser, and HDRIs for Iray.
They go well with Greenlands, Top of the World and Winter, but of course you can use them with anything.
There are two Iray-preloads for each.
One just loads the HDRI and keeps all render settings at the Daz Studio default.
The other one, “Less sun burn”, changes the “Burn Highlights” value in the Tone Mapping tab. It`s useful for against-the-sun renders on non-HDR screens.
General tips:
-If you want to use the new spheres combined with the terrain from other Easy Environment sets, don`t forget to delete the older skybox (or sphere) from the scene.
If you don`t they`ll block each other out or intersect.
If you use the Iray HDRIs (render presets) you also have to make sure no physical skybox/skysphere is left in the scene
-Reminder (Daz Studio): Older Easy Environments were in Poser format, since “EE: Hell” they come in native .duf format. So make sure to look in the right folders if you are a Content Library user.
As always: Keep the camera angles wide 😉
21)
Witchcraft: Sacrifice & Eclipse (SkySphere/HDRI)
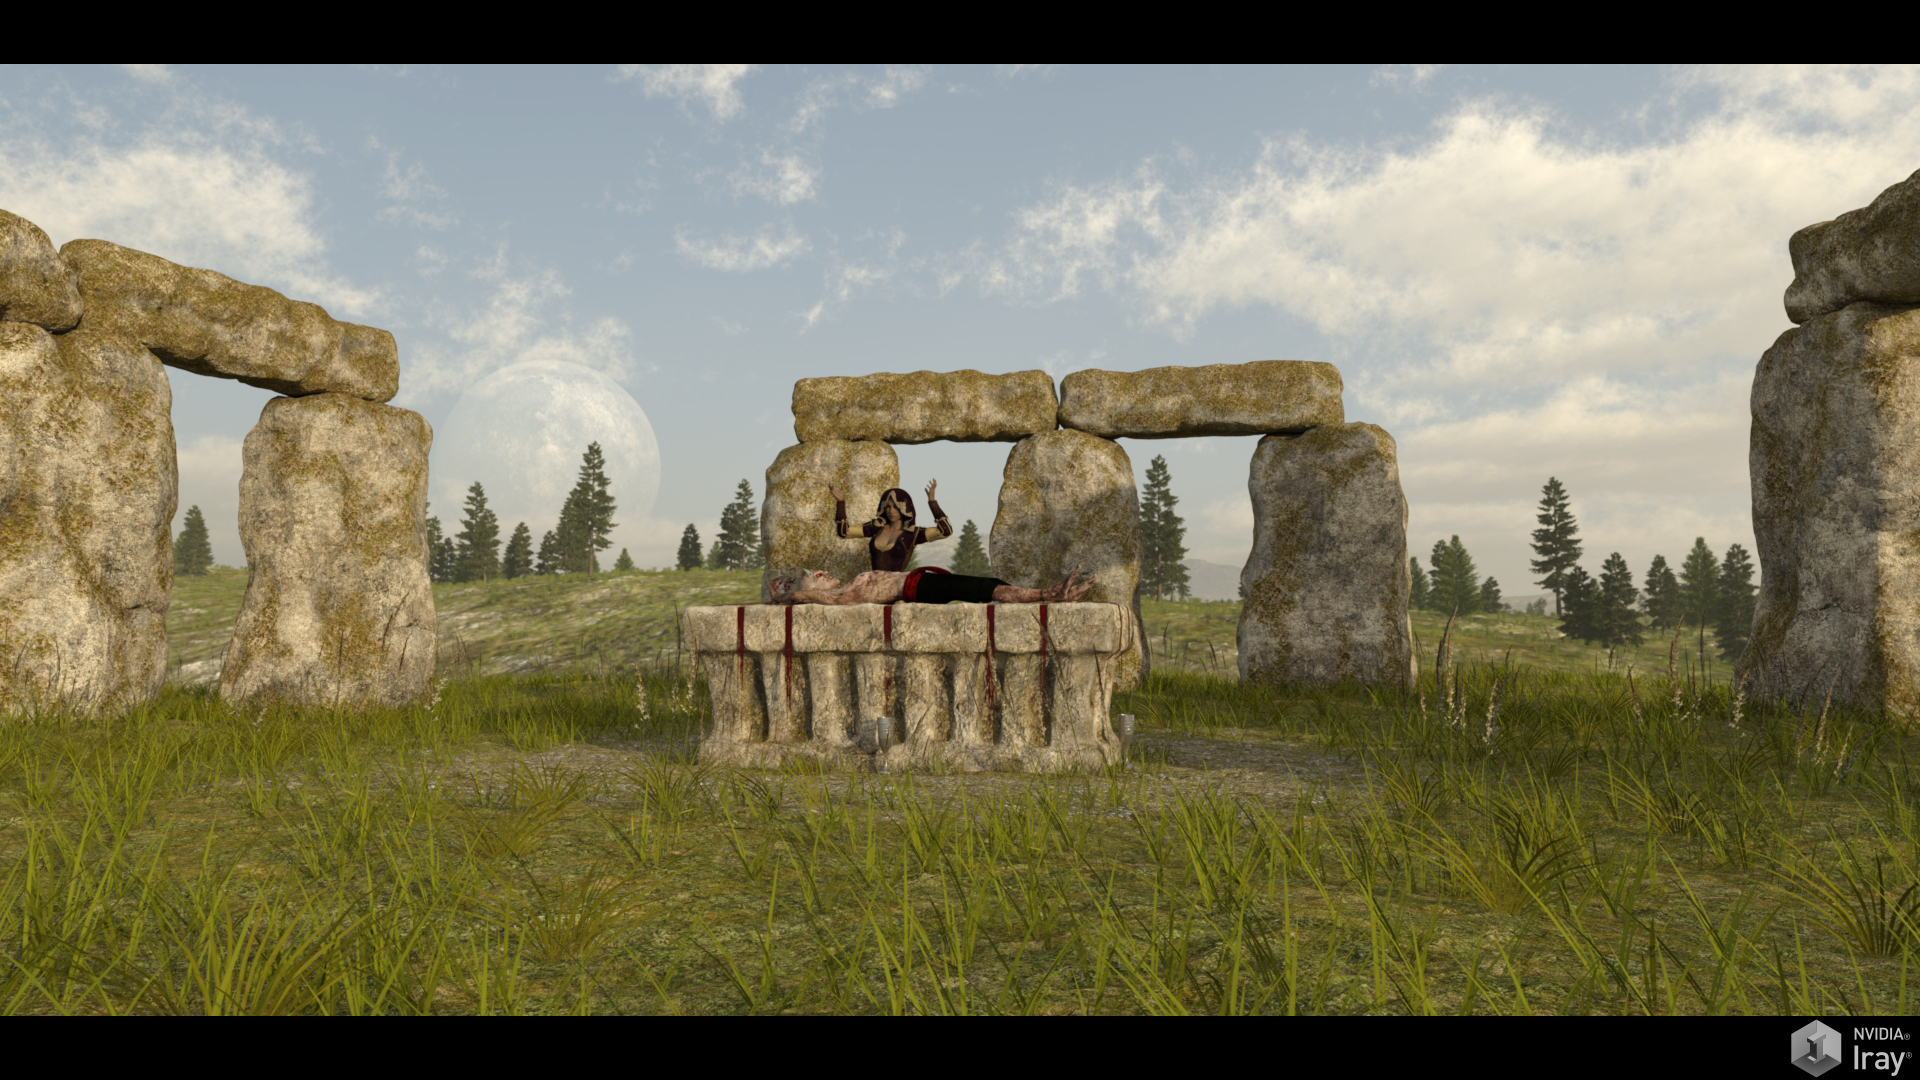
Starting with the set specific things:
The terrain on the two sets is similar but not identical. The center of the Eclipse terrain is entirely flat, while Sacrifice has some small bumps. This makes the Eclipse terrain a better choice if you want to place somthing flat on it (e.g. a plane with spell effects), while the Sacrifice terrain has a slightly more natural look.
The center texture on Sacrifice has some moss in the middle, Eclipse is purely gravel. The textures are interchangeable, if you have both sets.
The Sacrifice altar has a “straighten” morph, accessible with the altar selected.
The rope morphs become accessible by selecting the ropes, which are parented to the altar (if you don`t see them right away expand the altar in the object list).
General tips (copy&paste from sets above):
-If you want to use the new spheres combined with the terrain from other Easy Environment sets, don`t forget to delete the older skybox (or sphere) from the scene.
If you don`t they`ll block each other out or intersect.
If you use the Iray HDRIs (render presets) you also have to make sure no physical skybox/skysphere is left in the scene.
-Reminder (Daz Studio): Older Easy Environments were in Poser format, since “EE: Hell” they come in native .duf format. So make sure to look in the right folders if you are a Content Library user.
The 3Delight lighting is parented to the skysphere, thus rotating the sky automatically rotates the lighting as well, keeping the sun in the right place.
As always: Keep the camera angles wide 😉
22)
ExoPlanet I-III (SkySphere/HDRI)
Since ExoPlanet II and III are first-time Renderosity releases and may bring in a couple of new people I`ll start with some general tips which have been covered on previous sets.
A tip I don`t get tired to mention, try toying with the focal length (wide angles) of your cameras to get the best out of any Easy Environment set.
This is especially true for Poser users because Poser`s default cameras are extremely narrow.
More on this here: 6) Easy Environments -Cameras
Another worthy topic is lighting.
–Iray Lighting: The lighting comes entirely from the HDRI environment image. Make sure you don`t have any physical skyboxes or skyspheres loaded into your scene, they would block out the HDRI and you`d get an entirely black scene.
–3Delight Lighting: The more recent Easy Environments, ExoPlanets included, have the 3Delight lighting parented to the skysphere.
This means you can rotate the skysphere to your heart`s desire, the lighting will rotate with it and the sunlight keeps coming from the right direction.
–Poser Lighting: The lighting is a separate preload found in Poser`s lighting tab. If you rotate the skysphere you will likely want to adjust the lighting accordingly to match the changed sun position. I think in many cases it would be less work to rotate your character and/or other geometry in your scene.
ExoPlanet I:
Not much set-specific info here. Iray users may wonder why they get only one “Scene” preload, whereas 3Delight has two of them.
Worry not, this is just because 3Delight has a normal and a red lighting version, while Iray`s lighting comes from the HDRI. So for Iray the “scene” preload doesn`t change, it`s your choice of normal or red HDRI which makes the difference.
ExoPlanet II:
This set has two plateau levels to place your figures on. If you want more space (let`s say to place a spaceship) you can hide or delete the top-plateau. If you do so, also hide the top-plateau`s plants and cobble-stones to avoid having that stuff floading in the air.
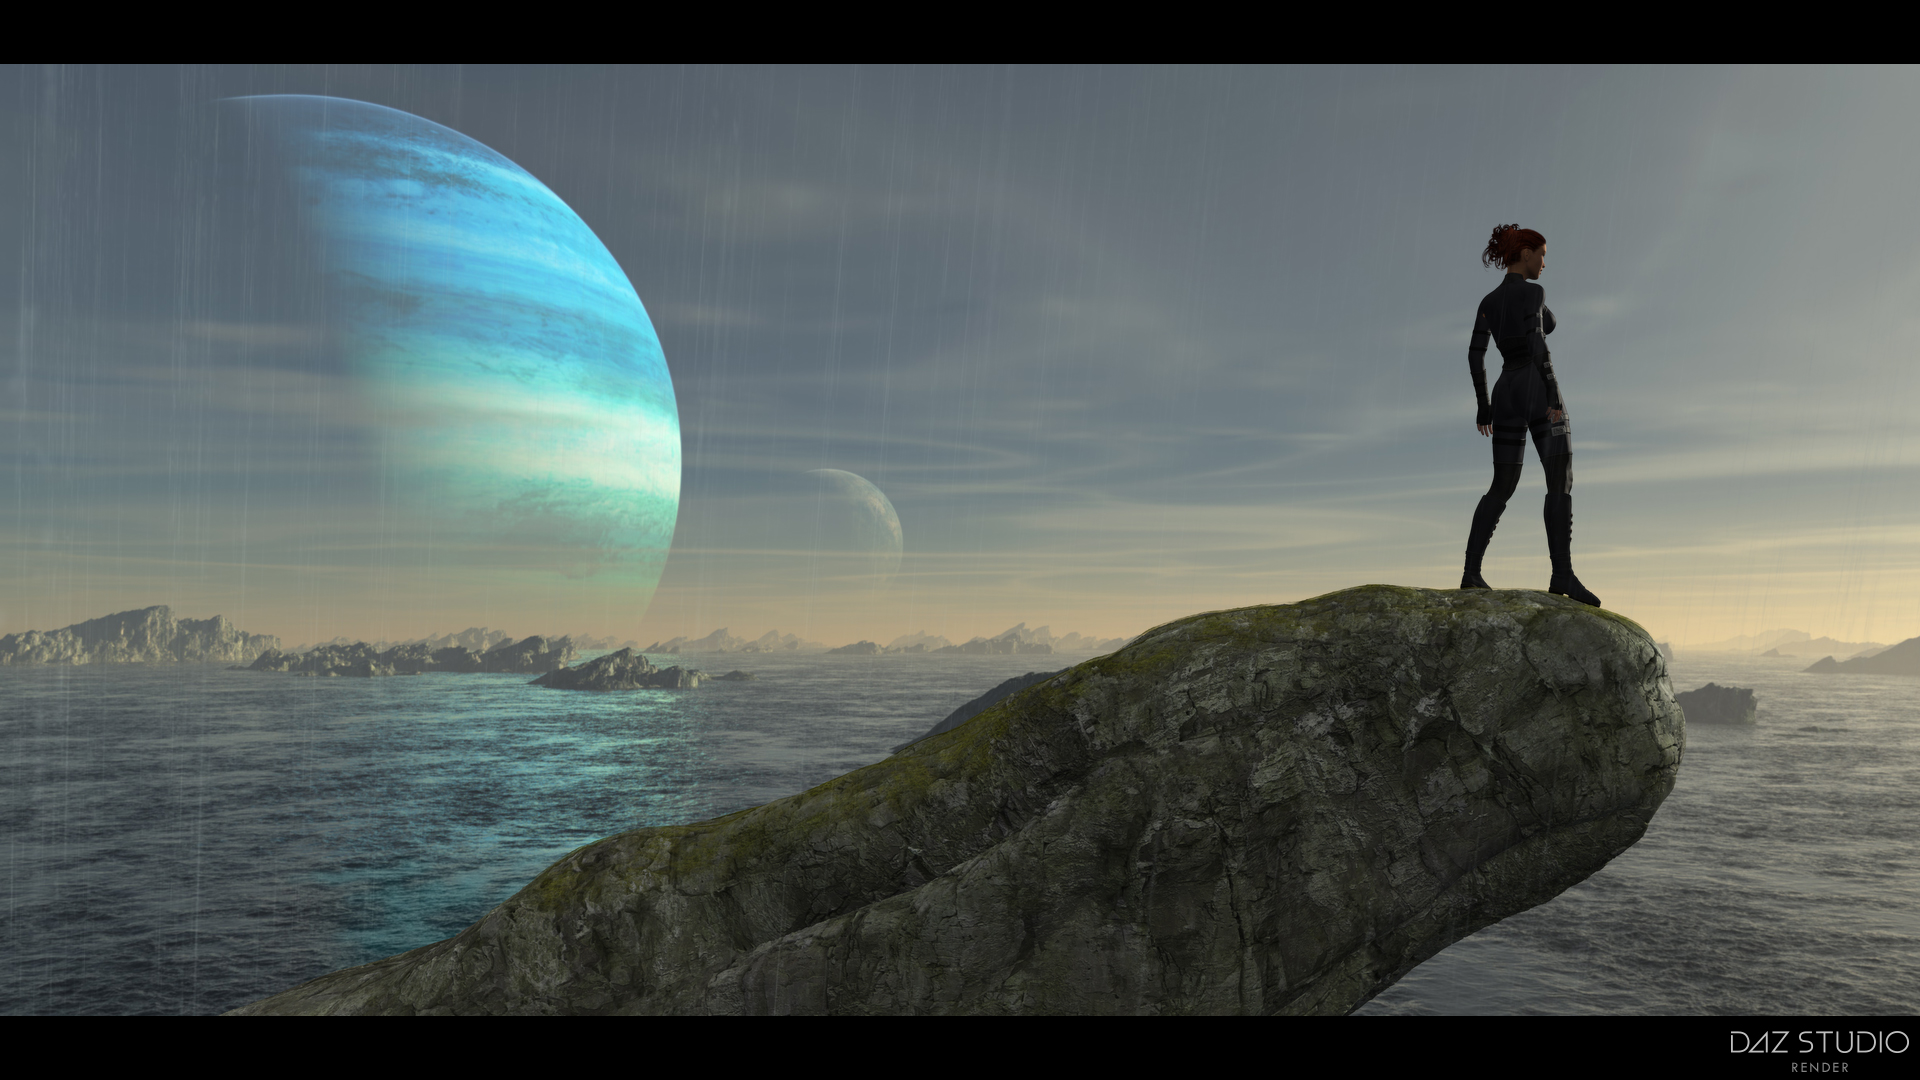
ExoPlanet III:
The rain can be deleted or hidden. You can change it`s intensity a bit by changing it`s Opacity Strength in the surface settings (Daz Studio). This should work similar for Poser, but I think you`d have to change the intensity with a math-node (add, subtract) there.
Some users may want to change the scale of the rock a bit, which should work fine. If you do so you should scale the Moss layer as well. They share the same origin, so it should be pretty straight forward.
ExoPlanet II & III, Smart Content (Daz Studio):
Smart Content (Metadata) is included with both sets, but Daz Studio doesn`t automatically read metadata for products not sold at their store.
If you want to use it you can go to the little options menu on top of the Smart Content tab, choose “Content DB Maintenance” and “Re-import Metadata”.
You should find the metadata (starts with LOCAL_USER_ …) in the product list that pops up.
Or:
Go to your Runtime, find the “Support” folder, and double-click the set`s .dsa file (e.g. LOCAL_USER_Easy_Environments__ExoPlanet_II.dsa). This should launch Daz Studio with a dialogue asking if you want to import the Metadata (Smart Content).
It`s possible that using Daz Studio`s Re-Import MetaData option would also work, I didn`t get to test that.
Note: ExoPlanet I will release with Metadata provided by Daz3d, so that should work out of the box.
23)
ExoPlanet IV / Sunset / FM Chasm (SkySphere/HDRI)
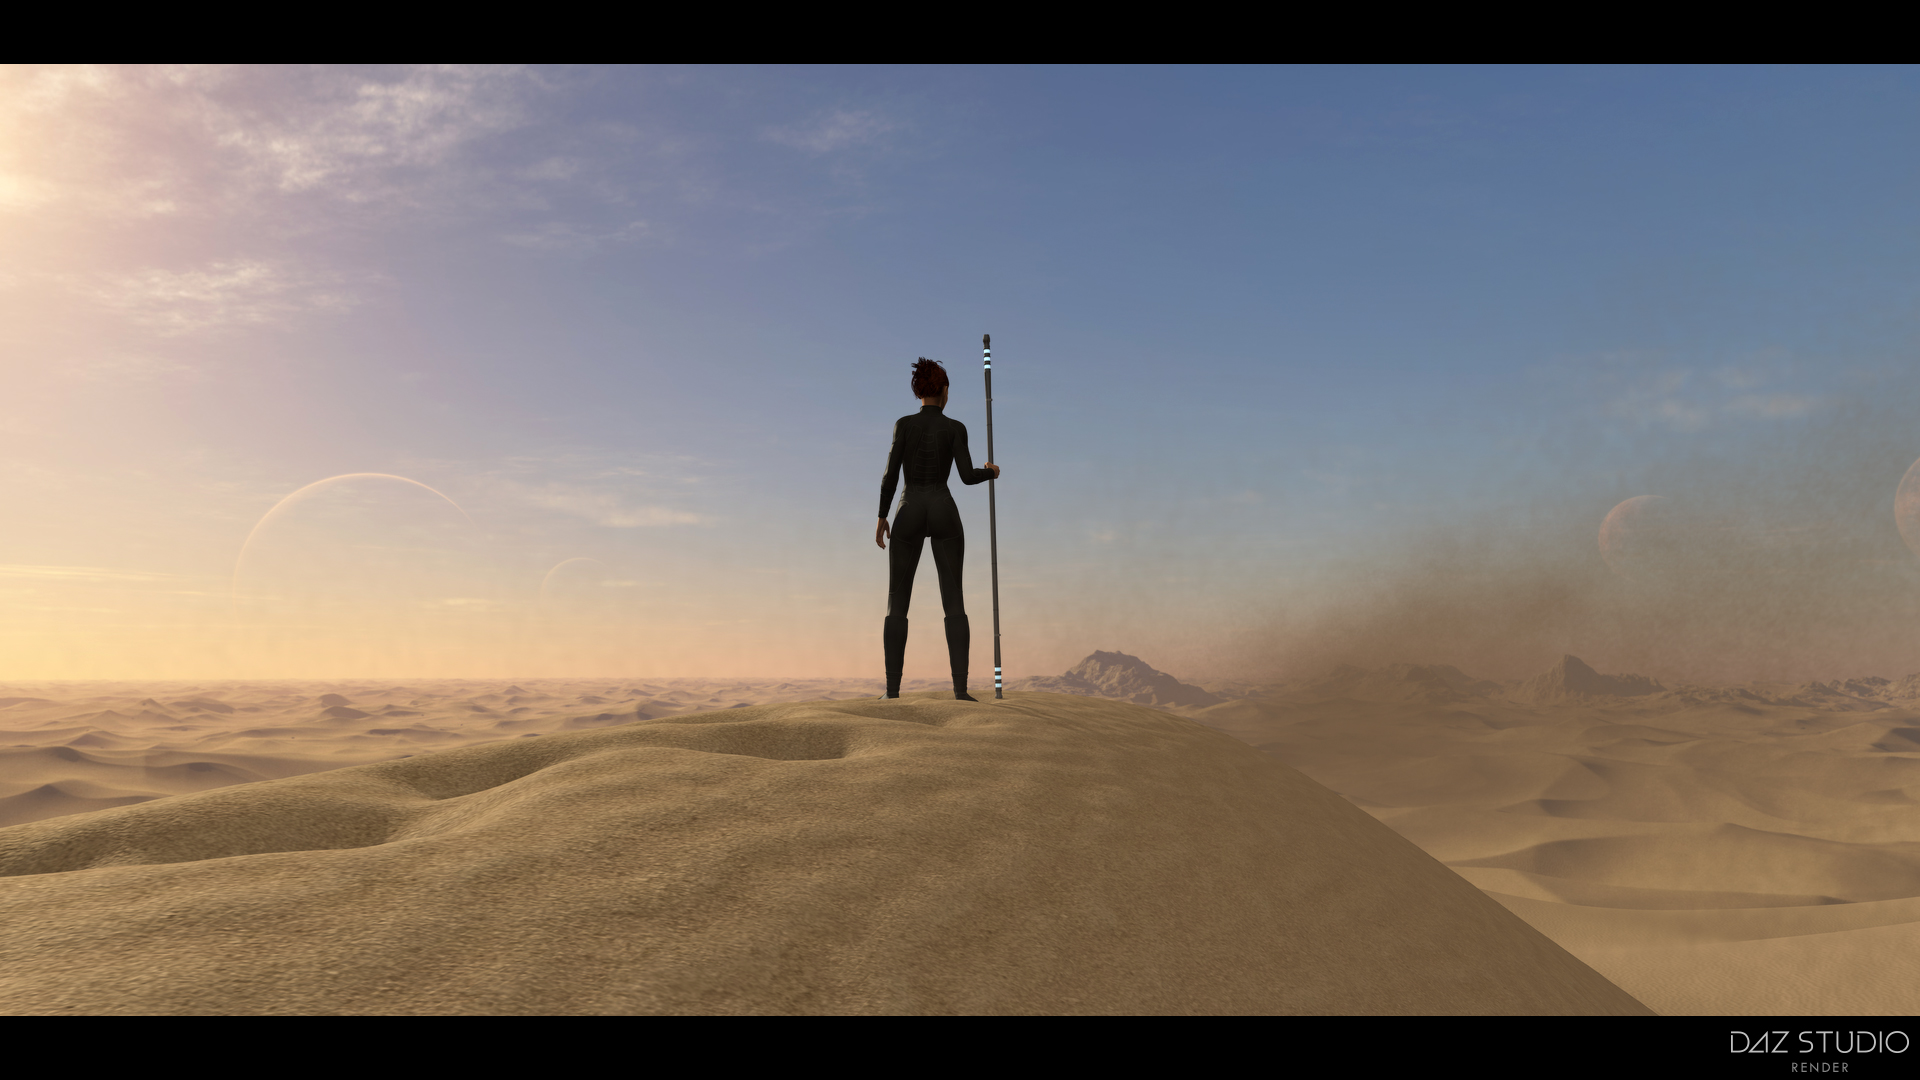
ExoPlanet IV:
For the most part this works the same like ExoPlanets I-III.
If you select the Dunes geometry you get three morph options to dial-in trails.
The Daz Studio versions use Subdivisions (Lvl1) for rendering, which makes the trails smoother and fixes some rough looking shadowing on the Iray version. The Viewport (preview) is set to Subdivisions 0 to keep it more responsive.
On Poser I didn`t dare to save it with Subdivisions as preset, because it seemed to slow Poser (10) down a lot.
If you find the trails to look too rough you might want to set the Dunes to Subdiv 1.
ExoPlanet IV: Sunset:
This is a Standalone Addon including a new skysphere/HDRI. Of course it`s made to work well with ExoPlanet IV, but the base set is not required.
Note for Poser / 3Delight users: This loads a new skysphere into the scene, make sure to only have one sphere active, to avoid overlaps. In case of 3Delight it also loads lighting (parented to the sphere), so be careful to not have two lighting sets loaded at once.
FM Chasm:
Technically not an Easy Environment, but complementary to ExoPlanet IV.
The main tentacle loads in two versions, “Threat” is visible by default, “Attack” is hidden by default. Simply show/hide the one you need for your scene.
For Poser & 3Delight there are two lighting options included, daytime and sunset.
Those are slightly modified versions from ExoPlanet IV / Sunset. E.g. the sun direction is a bit steeper to get more light into the Chasm.
3Delight note: Keep in mind Daz Studio adds lighting presets (unlike Poser which overwrites). If you already have lighting in your scene, e.g. from a skysphere, either don`t load the Chasm lighting or remove the original lighting.
Daz Studio / Smart Content users:
Smart Content (Metadata) is included with all three sets, but Daz Studio doesn`t automatically read metadata for products not sold at their store.
If you want to use it you can go to the little options menu on top of the Smart Content tab, choose “Content DB Maintenance” and “Re-import Metadata”.
You should find the metadata (starts with LOCAL_USER_ …) in the product list that pops up.
24)
Clouds (SkySphere/HDRI)

This set holds four skysphere/HDRI preloads for each version (3Delight, Poser, Iray), no geometry.
Really not much extra-info needed I think, load&render. 😉
I found that camera-width/focal length work very well here for making the clouds look closer or further away from your foreground object.
25)
Autumn Hills (SkySphere/HDRI)

3Delight & Poser rendering:
The vegetation takes its toll on render-times, especially the tree leaves. My 1080p promo-renders took about 10 to 15 minutes (on a 980TI).
For quick test-renders I recommend turning off the leaves (they are separate items from the trunks) or turning off their shadows, and turning them back on for your final render.
Iray Brightness and Rain:
It was quite hard to find a good brightness balance for the Iray version, either the shadow side felt too dark or the sunny side too bright.
I settled for what I felt was the best compromise, but if you want to tweak it for your particular camera angle the best option to toy with is Render Settings/Tone Mapping/Exposure Value. (Note: all promo renders were done with the preload default to display what you get out of the box).
The rain-prop imo presents a similar issue, it can look too strong/soft depending on the camera angle.
The quickest way to adjust it is Surfaces/Cutout Opacity (lower value to soften it).
In order to soften it you could also load the 3Delight alpha texture into the Cutout Opacity channel, it`s a different texture from the Iray version.
Morphs:
To dial in/out the morphs select AHGround and find the morphs under the Parameters or Shaping tab.