Shader Basics
Shader Basics Daz Studio Tutorial for Beginners
What is a Shader?
In 3D, especially in Games, the term can refer to a lot of things.
Within Daz Studio, it usually simply refers to the properties, the appearance of a surface.
Sounds like Materials, what`s the difference?
Materials are bound to a specific object, for instance a skin for a figure like Genesis.
They usually only work with the object they were designed for.
Shaders are generic, they are not tied to a specific object. They can be applied to any surface.
How to apply Shaders:
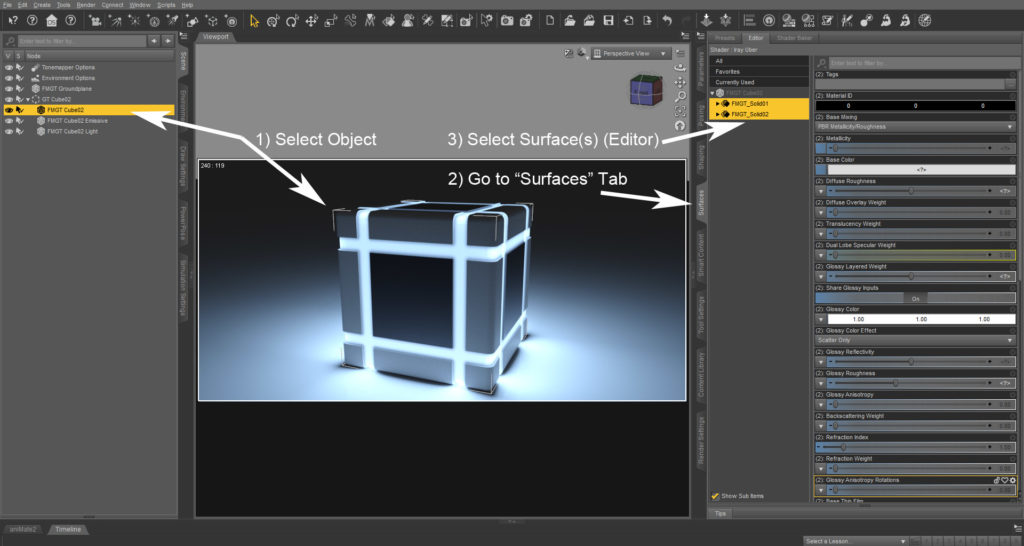
1) Select the object(s), either in your object list or directly within the scene. Make sure to really select an object, not a group or null.
2) Go to the “Surfaces” Tab. If it`s not visible, you can open it under “Window/Tabs/Surfaces”.
3) In the Surfaces Tab, select the surfaces you want to change. You can select multiple surfaces by holding ctrl or shift.
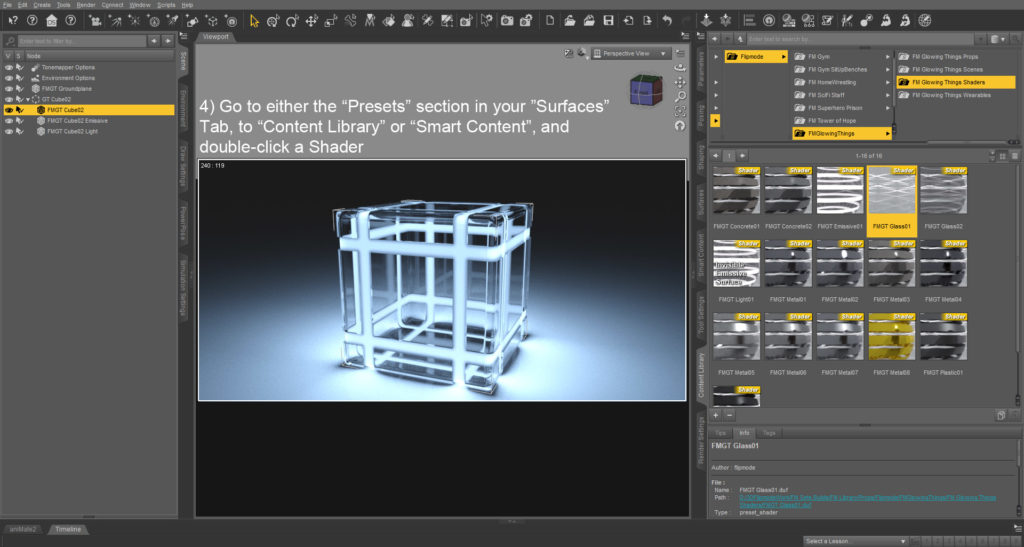
4) Double click a Shader to apply it to those surfaces.
You can find Shaders in various places: Your Content Library, the Smart Content Tab, or directly in the Surfaces Tab by switching from “Editor” to “Presets” (Top row in the Surfaces Tab).


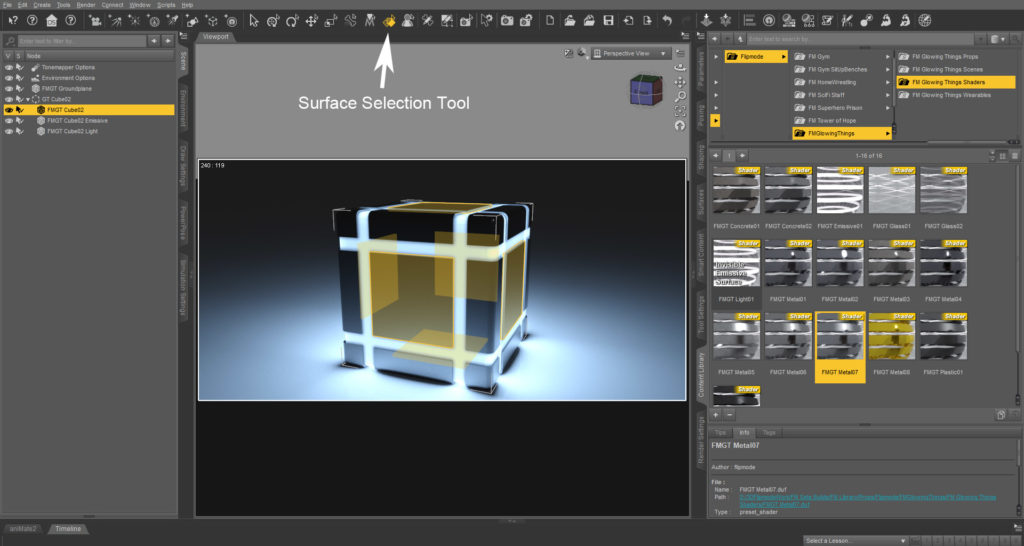
2B) As an alternative to selecting surfaces through the Surface Tab, Daz Studio also offers a Surface Selection Tool. This allows you to select surfaces by clicking on the object.

Any important surface settings I need to know about?
The one setting I would like to point out is Horizontal Tiles / Vertical Tiles.
If the Shader is based on textures, this will define how big or small the texture details look on your surface. Since the Shader doesn`t know the size of your objects, you might want to change how often the texture repeats across the surface.
For a deeper look into Iray Surfaces I recommend SickleYields Tutorial.