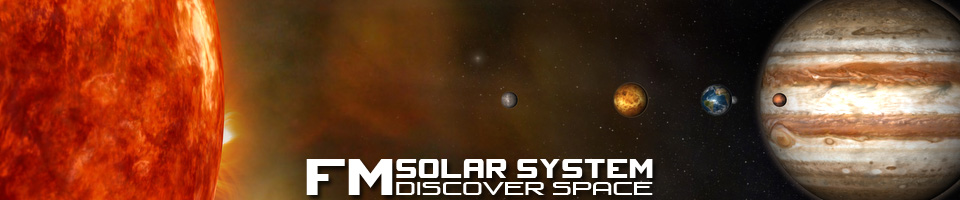
FM Solar System Info
Index:
– 1) Where to find your content
– 2) How halos and sunrays work
– 3) General tips for working with the solar system
– 4) aniBlocks
– 5) Authenticity & creative freedom
1) Where to find your content
(Poser Formats)/Props/FMSolarSystem: The solar system figure, the stars, and more.
(Poser Formats)/Materials/FMSolarSystem: Materials for the stars, earth, and orbits.
(Poser Formats)/Poses/FMSolarSystem: Visibility presets, shuffle planets, and more.
(Poser Formats)/Light/FMSolarSystem: Two light presets.
(Poser Formats)/Camera/FMSolarSystem: Cameras for preset and shuffled pose.
All Daz Studio files load automatically, no Poser to DS adjustments required.
2) How halos and sunrays work
Most importantly…out of the box!
However, it can be broken, so it`s good to know how those things are done.
Poser: Basicly halos are planes pointing towards the camera. When you load the solar system Poser will switch to Dolly camera (and also adjust distance settings because the defaults are too short). As long as you stick to Dolly cams everything will work fine, if you change you would have to adjust pointat targets. I recommend to stick with the Dolly cam though, the scene is huge and dolly is the best way to navigate it.
Daz Studio: Like on Poser, the halos point at cameras. On DS when you load the set a script is auto-loaded which monitors your camera-switches and adjusts the halos accordingly. The bummer: When you save as scene and reload later, the script is not saved with the scene. In this case please load the script manually (Props/FMSolarSystem/07HaloScriptDS)
3) General tips for working with the solar system
-If you want to change any orbit distance just scale the according joint.
-Keep in mind you can also rotate the stars, they are properly centered.
-You can also use color (diffuse or ambient) to alter the look of the stars.
-The AR info boards only use a transparency map, so you can color them to your liking.
-For single planet renders I found it more easy to use the solar system and apply one of the planet visibility poses than using the single planet preloads, because doing it like that you don`t have to reposition for lighting.
-Speaking of lighting…all “cast shadows” are off by default, for both lights and planets. That`s how all previews were rendered. In 99% of all cases you don`t need shadows, the “dark side” gives the same result. On the other hand, if shadows were on by default the planets would cast shadows on each other, which usually is not desired…in the preset state you would not see anything behind Jupiter.
-Daz Studio: Aside from the camera presets, the “frame” button for cameras is your friend, but only if you have the right object selected. E.g. to frame earth make sure you have the actual planet selected, not it`s orbit joint.
–Scale: The solar system is 25% of the seperate planet preloads. This makes it more easy to manage the full scene, while the planets are of reasonable size to be used on their own.
–Close ups: If you move the camera very close to a planet the halo might seem to shrink away, that`s due to the angle between cam and halo. Solution 1: scale up the halo.
Solution 2 (I prefer this one): Instead of moving that close with the camera use the focal length to zoom in. This also makes for a nice “Battlestar Galactica” style, it adds to the feel of scale in space.
–Changing the info boards: If you want to change the text on an info board (e.g. because it`s outdated) you might want to download the used fonts, which are:
Space Marine (Title) >Download here<
Venus Rising (Text) >Download here<
It`s easy enough to edit it right on the texture, but if you want you can also grab the source .psd: >Download Infoboards PSD<
4) aniBlocks (free for Daz Studio)
Those are simple anims, you can choose from rotate-only, and orbit&rotate.
Keep in mind you can adjust the playback speed of aniBlocks, I used 25% to 40% for the preview video.
There is a small ease-in at the start of the anims, DS seems to always try to smooth, or I didn`t find the place to turn it off. I recommend to start renders a bit after the anim start to avoid those speed differences.
Also due to that smoothing, Pluto unfortunately goes a bit off-rail. If needed you could probably fix that by adding more keys.
5) Authenticity & creative freedom
I tried to find a sweet spot between authenticity and nice visuals. Whenever possible I stayed close to the real thing, but not at the cost of bad graphics or awful scene handling.
Relative planetary size: Yes
Relative sun size: 10% reduced, Pose included to set it to the correct 100% (which will swallow half of the scene, so I don`t recommend using it without good reason)
Relative orbit distance: By default it`s stylized. Larger distances are larger, but not to the real extent. You can apply the relative distances pose, which assumes earth at 1AU and has the other planets relative to it. However, while more accurate, it doesn`t make much sense for rendering, the distances are just too big.
Planetary textures:
-Mercury: made from photos, but stylized, craters and such are randomly placed.
-Venus: authentic
-Earth: authentic
-Moon: authentic, slightly enhanced with added structures and craters
-Mars: authentic
-Jupiter: authentic, slightly enhanced
-Saturn: authentic, slightly enhanced
-Uranus: authentic, slightly enhanced
-Neptune: authentic, slightly enhanced
-Pluto: authentic
(slightly enhanced means that I added or pronounced small detail to give it more stucture, but it`s stil very close to the original source)